Boarding a loft is a relatively simple process.
So, is it easy to board a loft yourself?
Provided they have a certain level of expertise and know-how, homeowners or DIYers can do it to keep costs down.
The good news is:
At Roofing Superstore, we have an array of loft boards to create your boarded loft, including OSB board to moisture-resistant chipboard, general-purpose hardwood plywood and more.
We also have this in-depth, step-by-step guide to show you how to board a loft and how much it might cost you.
Table of contents
- How to board out a loft
- How many loft board support legs do I need?
- Why should you board a loft?
- How much does it cost to board a loft?
How to board out a loft
So, what do you need to board a loft? Here’s a breakdown of things you need to obtain:
- Loft flooring boards (purpose-built recommended)
- Loft insulation (if not already installed)
- PPE (Overalls, gloves, goggles, dust mask, knee pads and shoes)
- A piece of board to use as a platform
- Tape measure
- Supports (aka loft legs such as Loftleg)
- Screws
- Screwdriver
- Handsaw
- Hammer (optional)
Got everything handy?
Let’s take a closer look at the steps you need to follow.
Step 1: Preparation
Before you board your loft, ensure that you have the correct safety gear in place. This will typically include overalls, gloves, a dust mask and shoes that allow for easy movement. You’ll also need to set up a temporary platform to work on. This can be a piece of board placed across some of the ceiling joists.
Also, remove any items (i.e. suitcases, the Christmas decoration) you normally store in the loft from the space to ensure a clear.
Step 2: Measure the loft area
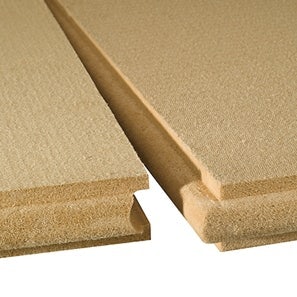
Measure the area you’re going to board. This will allow you to calculate the number of loft flooring boards you’ll need. We’d recommend using purpose-built loft boards. These tend to have tongue and groove fittings which are much easier to install and are often shorter. So they’re easier to get through your loft hatch.
Step 3: Insulation
The next step is to ensure you have insulation within your loft floor. If not, this is the perfect time to install loft insulation.
You can find out more about installing loft insulation and more advice through our loft insulation guides.
Step 4: Add supports (if required)
When installing loft boards, do not squash down the loft insulation. This reduces the effectiveness of the insulation and can lead to condensation. This will then often result in dampness, mould and rot.
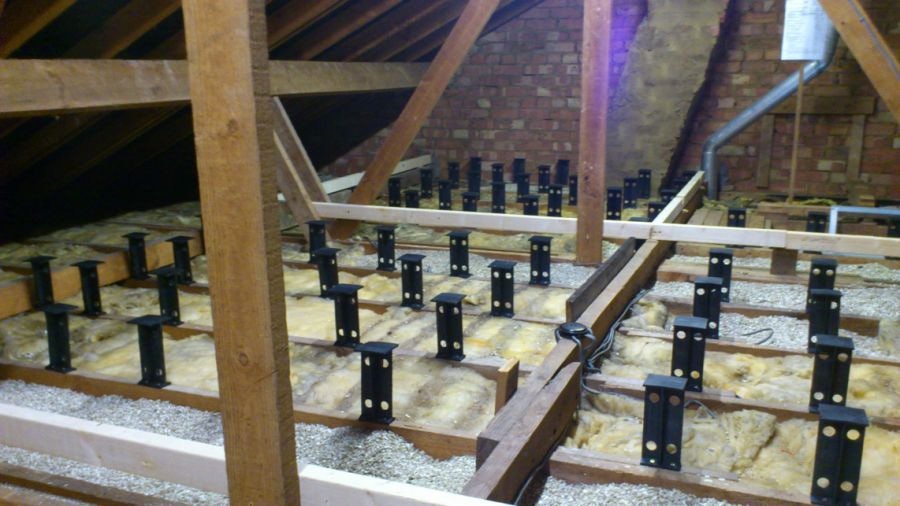
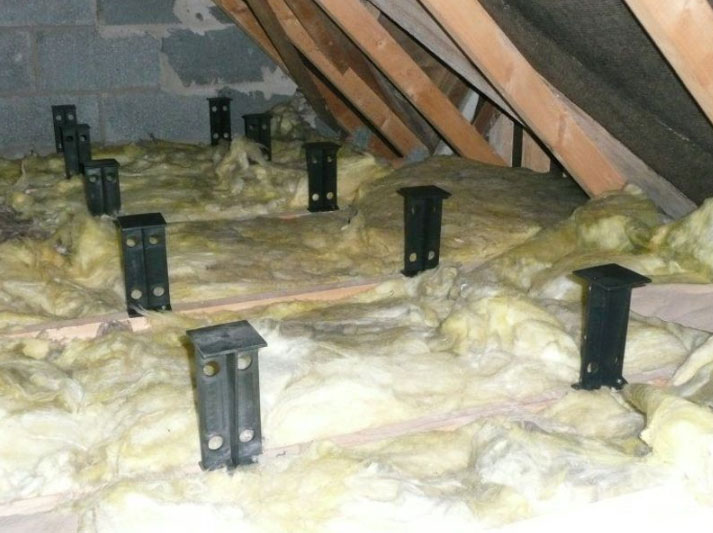
So, if the insulation lies above the roof joists, you must raise the loft floor. You can do this using supports, such as Loftleg products which you can find here at Roofing Superstore.
With that in mind, here’s how to board a loft with loft legs:
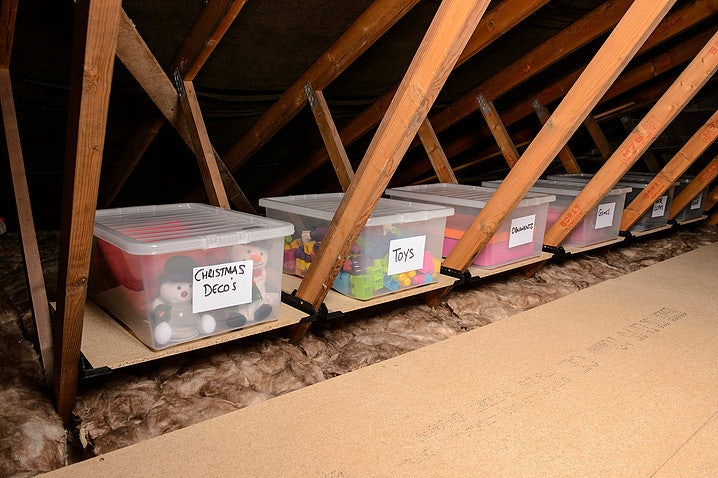
Attach the supports to the ceiling joists or roof trusses, spaced around one metre apart. Then you can install the loft boards directly onto the supports. This results in a secure raised loft floor. A perfect solution that allows the insulation to work effectively.
If you’re not sure how many supports you need, you can use the tables to calculate the number of packs required.
Step 5: Lay loft boards
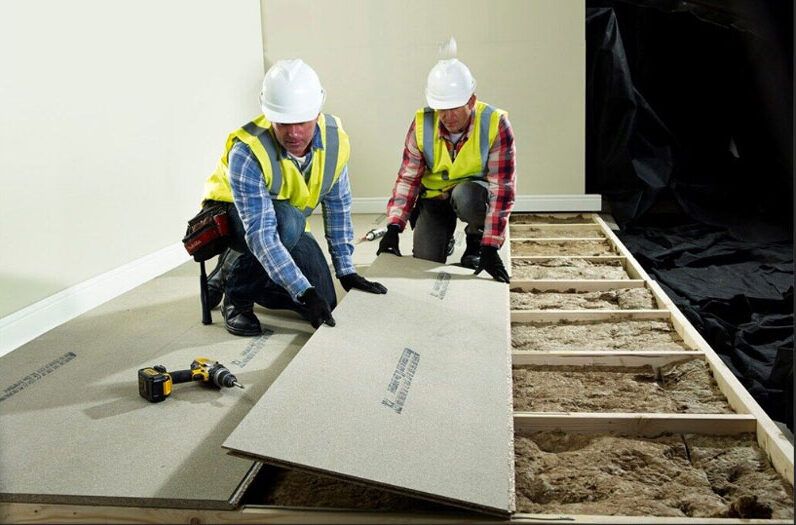
Now lay the first loft board across the joists, ensuring the end of the board does not overhang the joist. If it does, cut it to ensure it only reaches the centre point of the joist. This will allow you to fix the adjacent board securely to the joist.
Next, lay the other loft boards in a staggered pattern to make sure the joins between each board do not join up. Use around 2-3 screws per join, and don’t forget to check the tongue and groove connections are flush.
Note: If there are light fittings in the ceiling, you must cover these. Use a downlight protector to prevent the insulation from touching the light fitting.
Step 6: Add infill where required
Running along the loft, you’ll experience gaps as the staggered pattern continues. You can fill these gaps with pieces of infill which need cutting as you go along. Use a hammer, if necessary, to lightly tap the infill pieces into place. Then secure them with screws as you would with normal-sized loft boards.
With that, you now know how to board a loft for storage!
How many loft board support legs do I need?
You can measure the distance between the centres of the joists to identify how many supports you need. The calculation is as follows:
Number of joists being covered by the boards x number of legs needed across the joists to support the boards = Total number of loft leg packs needed
You can then calculate how many loft legs you need by dividing them by the number of supports in the packs. This will typically be 12, so the calculation will be as follows:
Total number of loft legs ÷ 12 = number of packs needed
Alternatively, you can use the table to find out how many loft legs you need for your projects.
400mm joist spacing
| No. of sheets | Area(m2) | No. of legs | No. of packs required |
| 1 | 1.44 | 14 | 2 |
| 2 | 2.88 | 21 | 2 |
| 3 | 4.32 | 28 | 3 |
| 4 | 5.76 | 35 | 3 |
| 5 | 7.20 | 42 | 4 |
| 6 | 8.64 | 49 | 5 |
| 7 | 10.08 | 56 | 5 |
| 8 | 11.52 | 63 | 6 |
| 9 | 12.96 | 70 | 6 |
| 10 | 14.40 | 77 | 7 |
600mm joist spacing
| No. of sheets | Area(m2) | No. of legs | No. of packs required |
| 1 | 1.44 | 10 | 1 |
| 2 | 2.88 | 15 | 2 |
| 3 | 4.32 | 20 | 2 |
| 4 | 5.76 | 25 | 3 |
| 5 | 7.20 | 30 | 3 |
| 6 | 8.64 | 35 | 3 |
| 7 | 10.08 | 40 | 4 |
| 8 | 11.52 | 45 | 4 |
| 9 | 12.96 | 50 | 5 |
| 10 | 14.40 | 55 | 5 |
Why you should board a loft
There are many benefits to boarding a loft. Here are the main ones.
You create loft flooring
The first and most obvious reason for boarding a loft is to create flooring. Once there is flooring, you can start using the loft space for storage. This extra storage space can help you declutter your home and create more usable home space.
You create extra space
Boarding a loft is also valuable as there is an increasing desire for extra space. Having this extra space will help the potential selling value of your home increase. It can also create an improved living environment.
It minimises heat loss
Boarding the loft also helps reduce heat loss. It creates another barrier to any heat escaping from the roof. This is particularly key because when you have installed loft boards, insulation is often put in place simultaneously. Reducing heat loss also reduces the energy required for heating, resulting in lower utility bills.
How much does it cost to board a loft?
As with all projects, boarding a loft has no set cost. The total cost will depend on several factors, including:
- The loft area.
- The type of boarding you’re using.
- Whether you need to board the whole loft space or just a section of the loft for storage purposes.
Employing professionals to board a loft can cost as much as £1000 or more. On the other hand, the materials themselves can cost as little as £400. Of course, this cost is an estimate. Prices vary depending on the size of the loft, the amount of boarding and the geographical area.
To find out more, check out our guide on ‘Roof batten and board prices’.
Can you board a loft in a new build?
The short answer is yes. In fact, it’s recommended by some new-build insurers and warranty providers.
Even so, you must ensure this change will not affect your warranty with your provider. This isn’t to stop you from making the change but to ensure you are making a necessary change and only via the safest solution.
Remember – if you’re boarding a loft with loft boards, loft panels or loft flooring, this is only for storage space. This is because the design is not suited to withstand heavier loads (e.g., anything heavier than items like empty suitcases).
Planning permission is not typically required for loft boarding like it is with a loft conversion. Having said that, if you’re installing roof windows alongside the loft boards, you will likely need it signed off by building regulators. If you are unsure, it’s always best to check regardless of your plans.
Can you board a loft over insulation?
It’s often seen as a protective measure to do so when it comes to loft insulation.
Approved Document L states:
“Roofs: insulation should be installed tight to the structure, without air gaps, and should extend to the wall insulation. For roofs insulated at ceiling level, the long-term protection of the insulation layer should be considered: boarded areas should be provided above the insulation to give access for maintenance.”
So, if you have planning permission to do so and it will not invalidate your warranty, consider moving forward with the project now that you know how to board a loft.
If you have any questions about which loft boards are best for your project or want to know more about a specific project, don’t hesitate to get in touch.


