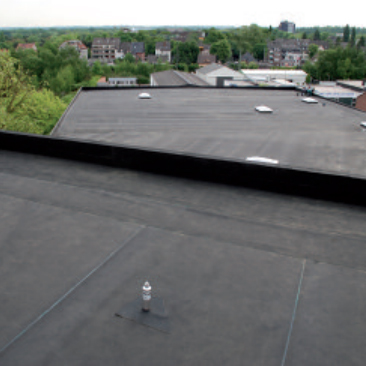
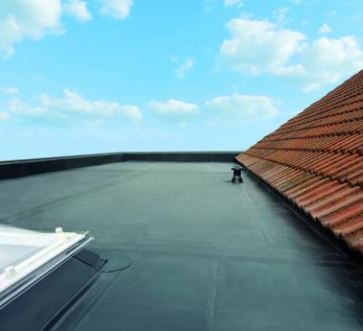
EPDM roofing provides a cost-effective solution to your roofing needs. With longevity in mind, you can expect this material to withstand the elements for over 50 years due to its ethylene and polypropylene qualities. Quick and easy to install, it creates a durable surface that requires minimal maintenance throughout its lifetime.
Table of contents:
- What is EPDM rubber roofing?
- EPDM roofing vs felt and GRP roofing
- How much does EPDM cost?
- How long does EPDM last?
- How to install EPDM rubber roofing
- Before you start
- Preparing EPDM rubber membrane
- Fitting EPDM roofing
- Maintaining EPDM roofing
- How to clean EPDM roofing
- The importance of regular roof inspections
- Common EPDM problems
- EPDM patching and repair
What is EPDM rubber roofing?
Ethylene Polypropylene Diene Monomer (EPDM) is one of the most versatile rubber roofing options on the market. Considered to be one of the best materials for flat roofs, rubber is a popular choice for industrial and commercial applications thanks to its ability to withstand extreme weather conditions. It requires little maintenance, is tear-resistant and has good insulation properties, which all contribute to its long lifespan.
EPDM roofing vs felt and GRP roofing
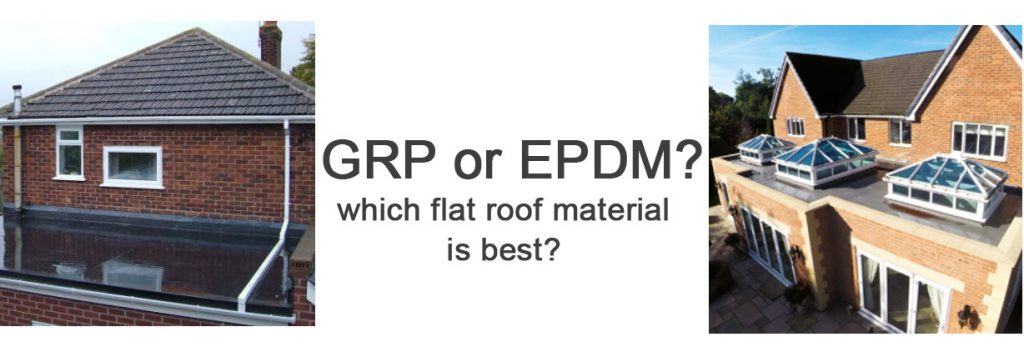
As the popularity of EPDM roofing has soared, traditional roofing materials such as felt have taken a backseat in the ever-evolving market. While EPDM is a strong material that’s easy to work with, offering an attractive finish, the cheaper felt option will need to be laid by a specialist and repairs run the risk of looking patchy.
GRP roofing’s attractive appearance is especially popular with homeowners. However, it should ideally be installed by a professional and often comes at a higher price point than EPDM.
How much does EPDM roofing cost?
One advantage of EPDM is that it’s suited to almost every roof type. This means that the overall cost is dependent on many factors, including the total surface area of the roof and the type of roof that requires EPDM covering.
In some cases, the current roof covering will need to be completely replaced. On other projects, EPDM can be laid on top of the existing material. Prices tend to vary depending on the work required. As a guide, EPDM rubber roofing costs, on average, £45 per square metre.
For a more accurate estimation, our EPDM roofing kit calculator will provide you with a quote bespoke to your project.
How long does EPDM last?
The expected lifespan of an EPDM rubber roof is over 50 years. That’s more than half a century of minimal maintenance thanks to its highly durable properties. While this type of roofing can be guaranteed for a 50-year period, it’s much more common for an EPDM manufacturer to offer a warranty of between 25 and 30 years.
How to install EPDM roofing
One of the great things about EPDM is that you can fit this type of rubber roofing yourself. If you’re a dab hand at DIY there’s no need to call a specialist. EPDM can be fitted using the installation process below.
Before you start:
Before you can lay EPDM, you must make sure the surface you’re laying it on is clean, dust-free and, even more crucially, dry. Any moisture can have a negative impact on the performance of rubber roofing. So starting with a clean, dry base is a must.
Choosing the right roof deck timber for EPDM
If you’re fitting a single piece of EPDM roof, the chances are it’ll have to be glued in place. Plywood or OSB sterling board offers the best bases for this type of rubber roofing. So consider purchasing a new roof deck timber before installation gets underway.
It’s important to note that bitumen has a negative impact on the performance of an EPDM rubber membrane. So any residue should be removed or over boarded prior to installation.
Over boarding vs full replacement
While it’s refreshing to fully strip a roof and start from scratch, there are instances where this approach is just not feasible. If you’re considering over boarding, the roof structure and timber decking must be in good condition. A close inspection of these will determine if over-boarding is possible. Flat roofs often require complete stripping. It’s common for the chipboard to crumble away after being exposed to the elements, leaving you with a base that’s less than ideal to work with.
Preparing EPDM rubber membrane
Spending time preparing the roof surface and relaxing the EPDM membrane will stand you in good stead for achieving the best appearance. Assigning time to this part of the process is an important step in ensuring a quality finish.
Cleaning the roof surface
The roof surface must be 100% clean, as any dust particles will not only be visible under the membrane but can stop the glue from bonding. You won’t achieve an aesthetically pleasing result with bumps under the membrane, but brushing the surface of the roof thoroughly at least twice should alleviate this problem.
Laying and relaxing the membrane
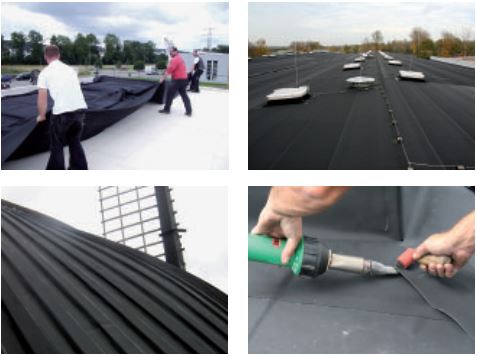
Before fixing the membrane in place, it needs time to relax as EPDM membranes often arrive tightly packed. This allows it to expand and contract back to its neutral state. Remember to unfold it carefully to ensure it doesn’t get dirty and allow it to relax in position for around 20 to 30 minutes. This is a crucial step; not factoring in relaxing time could leave you with a wrinkled surface that ponds water in the future.
Fitting EPDM roofing
The main steps of fitting EPDM roofing involve glueing and trimming the rubber roof membrane. This should begin once the membrane has had ample time to relax back to its neutral state.
Cutting and trimming EPDM rubber
Membranes are often large and cumbersome to work with, requiring trimming to a workable size. Carefully consider which part needs to be cut, as once a cut has been made there’s no going back. Sharp scissors will keep you on course and any final trimming can be completed at the end of the job with a sharp Stanley knife for the utmost precision.
Glueing EPDM rubber
There are two stages to glueing rubber roofing. The first involves applying an even coat of a water-based adhesive (WBA) to the roof decking area, having folded back half of the EPDM membrane. The glue should be kept approximately 150mm from the edges of the roof, as the contact adhesive will be applied in these areas later. The membrane can then be rolled from the middle outwards and firmly brushed onto the glue with a soft-bristled brush. Repeat this process for the second half of the roof.
The second stage focuses on details and edges, using a much stronger EPDM adhesive. This means you can stick it into corners and complete any other difficult detailing, while also using this substance on the 150mm edging, ensuring there’s no movement or wind lift in bad weather conditions. The contact adhesive should be applied to both surfaces. It should become touch dry before the membrane and substrate are in contact. A silicone roller can then be used to seal the glued membrane into place.
Choosing the right EPDM trimming
Along with providing an aesthetically pleasing finish, EPDM trims have practical uses too. Edge trims are required to keep water on your roof and direct it to a drip trim. This allows the water to drip off the roof and into a gutter.
EPDM edge trims
The job of an edge trim is twofold; to keep water on the roof and cloak the fascia to give the best finish from below. EPDM edge trims come in three different styles; kerb, metal and plastic. The one you choose largely depends on the type of project you’re working on and how you want the finish to look. For example, a metal edge trim does the job, but you might want something that looks more impressive if the roof is visible from upstairs windows.
EPDM drip trims
You’ll want to stay consistent with edge and drip trims. If you’ve decided on plastic edge trims, there are two styles of drip trim to consider; the two-part drip trim and the two-part clip together. They both need a plate nailed into position. The former requires the membrane to be nailed into place too, while the latter securely traps the membrane without the need for additional nails.
Metal drip trims can double up as wall trim and are a solid choice if the rest of the roof trims are also metal.
Fitting EPDM flashing
A new EPDM rubber roof needs to be fitted over the flashings where a roof abuts a brickwork wall. Typically, this is done with a plastic-coated metal flashing strip, known as a wall trim. Occasionally the same result can be achieved with a metal gutter drip trim if it’s universal. These are chased into the mortar between the brickwork and usually sit around 150mm above the roof deck.
Maintaining EPDM roofing
The good thing about EPDM roofing is that it requires little maintenance over its lifetime. It’s often chosen for its versatile durability, but keeping it clean and regular inspections will help to ensure it stays in optimum condition.
How to clean EPDM roofing
Cleaning EPDM rubber roofing helps to maintain its appearance and qualities, as well as enabling you to conduct roof inspections. Any loose dirt or debris can be easily swept or hosed off, leaving you with a clear area to apply a rubber roof cleaner. Working in small areas, apply the solution to the roof in circular motions with a soft brush or mop. Rinse the area well to ensure any dirty residue is removed from the membrane.
The importance of regular roof inspections
One of the best ways to ensure you get the maximum lifespan from your rubber roof is to have it regularly inspected. This should cover everything from a visual check for tears and punctures to a more thorough inspection of the drains and gutters. A good time to carry out an inspection is during the mild weather of spring and autumn, although it’s best practice to check a flat roof after a period of adverse weather too.
Common EPDM problems
As with any type of roofing, issues can occasionally crop up with EPDM. One thing that can easily be avoided is problems caused by incorrect installation, such as shrinkage. If you do have any problems with your EPDM roofing, it’s always advisable to seek help from a professional.
EPDM shrinkage
Shrinkage typically occurs because the membrane wasn’t given enough time to relax before being installed or due to a failure to fully adhere to the perimeter and angle changes. A skilled roofing professional will be able to advise on the best course of action in this situation. It’s best to act sooner rather than later if you think your roof has fallen victim to shrinkage.
Bubbles and blisters
As a result of the vapour from bonding adhesives becoming trapped or expanding air gathering within the roof structure, bubbles and blisters can form in an EPDM roof. Although this won’t cause your EPDM to fail, it has a negative impact on the appearance of your flat roof. These are normally best left alone, but if they appear on seams or the membrane looks damaged it’s advisable to call a specialist.
EPDM holes and leakage
Leaks can develop for several reasons, including holes, shrinkage and punctures within the EPDM membrane. The best way to deal with leaks is through prevention rather than cure, highlighting the importance of regular roof inspections and thorough cleaning. Although EPDM is a very versatile material, it can still suffer punctures in adverse weather, but one of the main advantages of EPDM is that it can be easily repaired.
EPDM patching and repair
If you confidently laid your own EPDM roof, the chances are you’ll be able to repair a hole or puncture yourself using a patch repair kit. Make sure the area is clean and debris-free before using an EPDM roof cleaner to ensure the patch will stick to the membrane.
Measure the patch and make sure you leave at least 50mm of membrane outside the damaged area, then round off any corners. Apply the patch following the instructions on the packet and ensure it’s fully sealed by checking for the bead that appears when the seam is bonded.
If you have any doubts about repairing a puncture it’s best to seek advice from a roofing specialist.
If you would like more advice or information regarding EPDM roofing, speak to our team on 01752 692 760.


